When unpacking, make sure that the product is intact and undamaged. If any parts are missing or broken, please call 1-425-224-6855 or email support@4lockedoffroad.com as soon as possible.
SKU: 3GT4R-COMPMNT
Warning
This product can expose you to chemicals which are known to the State of California to cause cancer, birth defects or other reproductive harm. For more information go to www.P65Warnings.ca.gov.
Materials
Parts
- (1) ARB Air Locker Manifold (ARB #171503)
- (1) 3rd Gen 4Runner/1st Gen Tacoma ARB Air Compressor Bracket Mount (4Locked Offroad #3GT4R-COMPMNT)
Hardware
- (2) M6 Bolts (included in ARB #171503)
- (2) M6 Nylon Nuts (included in ARB #171503)
- (2) M6 Fender Washers (included in 4Locked Offroad #3GT4R-COMPMNT)
Tools
- (2) 10mm wrenches
-OR- - 10mm wrench
- 10mm deep socket
Instructions
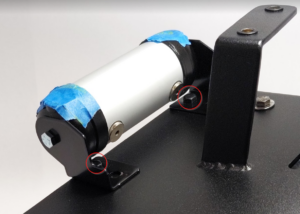
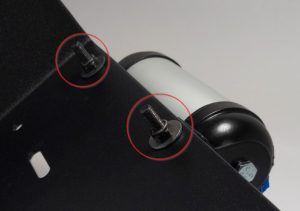
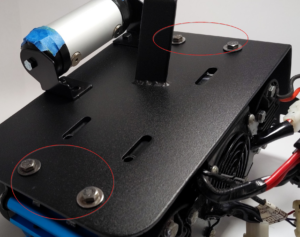
- Install the (2) M6 Bolts upside down and pass them through the (1) ARB Air Locker Manifold (ARB #171503) bracket and the (1) 4Locked Offroad Air Compressor Bracket (#3GT4R-COMPMNT) from the bottom up.
- Using (2) M6 Fender Washers included in the (1) 4Locked Offroad Air Compressor Bracket (#3GT4R-COMPMNT) and (2) M6 Nylon Nuts included in the (1) ARB Air Locker Manifold (ARB #171503), attach the air manifold to the air compressor bracket. The (2) M6 Nylon Nuts should be on the top.
- Tighten the screws.
Note
If the M6 bolts are making contact with the (1) ARB Air Locker Manifold (ARB #171503) cylinder, make sure the bolt is upside down so the (2) M6 Nylon Nuts and (2) M6 Fender Washers are on the top side of the (1) 4Locked Offroad Air Compressor Bracket (#3GT4R-COMPMNT).
Note
If you’re installing a different air locker manifold or a custom one you may have to modify it or create a bracket that matches our bolt hole pattern.
We suggest mounting the ARB Air Compressor with the air intake filter(s) facing the firewall. There are 3 benefits to doing this:
-
- You can install the ARB Air Filter Relocation Kit and have only a short route (and potentially no bends) to the firewall if you decide to relocate the air filters inside the cab for intake of cool dry air.
- The ARB Air Compressor Wire Harness provided with the air compressor is likely going to be the perfect length for a trim-free fit. Route the harness from the air compressor connectors (facing to the front of the car), under the (1) 4Locked Offroad Air Compressor Bracket (#3GT4R-COMPMNT), up and alongside the windshield wiper motor, along the top half of the firewall (go behind the factory Heater Control Valve Bracket), behind the Brake Master Cylinder and then the wire harness will branch two ways:
- One branch takes the spade connectors for the rocker switches through the driver side firewall, under/behind the dashboard and to your ARB Rocker Switches or ARB LINX device.
- The other branch takes the air compressor power wires along the driver side of the engine bay and to the front of the vehicle with your starter battery and body ground.
- Routing the ARB Air Compressor Wire Harness as previously explained results in the ARB Air Locker Solenoid Connectors (coming out of the ARB Air Compressor Wire Harness) to pass right by the ARB Air Locker Solenoids (installed in the ARB Air Locker Manifold). This allows for a perfect wire route with no hard bends and no excess wire so you don’t have to shorten or lengthen your ARB Air Compressor Wire Harness.
Materials
Parts
- (1) ARB Twin Air Compressor (ARB #CKMTA12 or ARB #CKMTA24)
- (1) 3rd Gen 4Runner/1st Gen Tacoma ARB Air Compressor Bracket Mount (4Locked Offroad #3GT4R-COMPMNT)
Hardware
- (4) M6 Bolts (included in ARB Twin Air Compressor Kit)
- (4) M6 Washers (included in ARB Twin Air Compressor Kit)
Tools
- 10mm wrench
Instructions
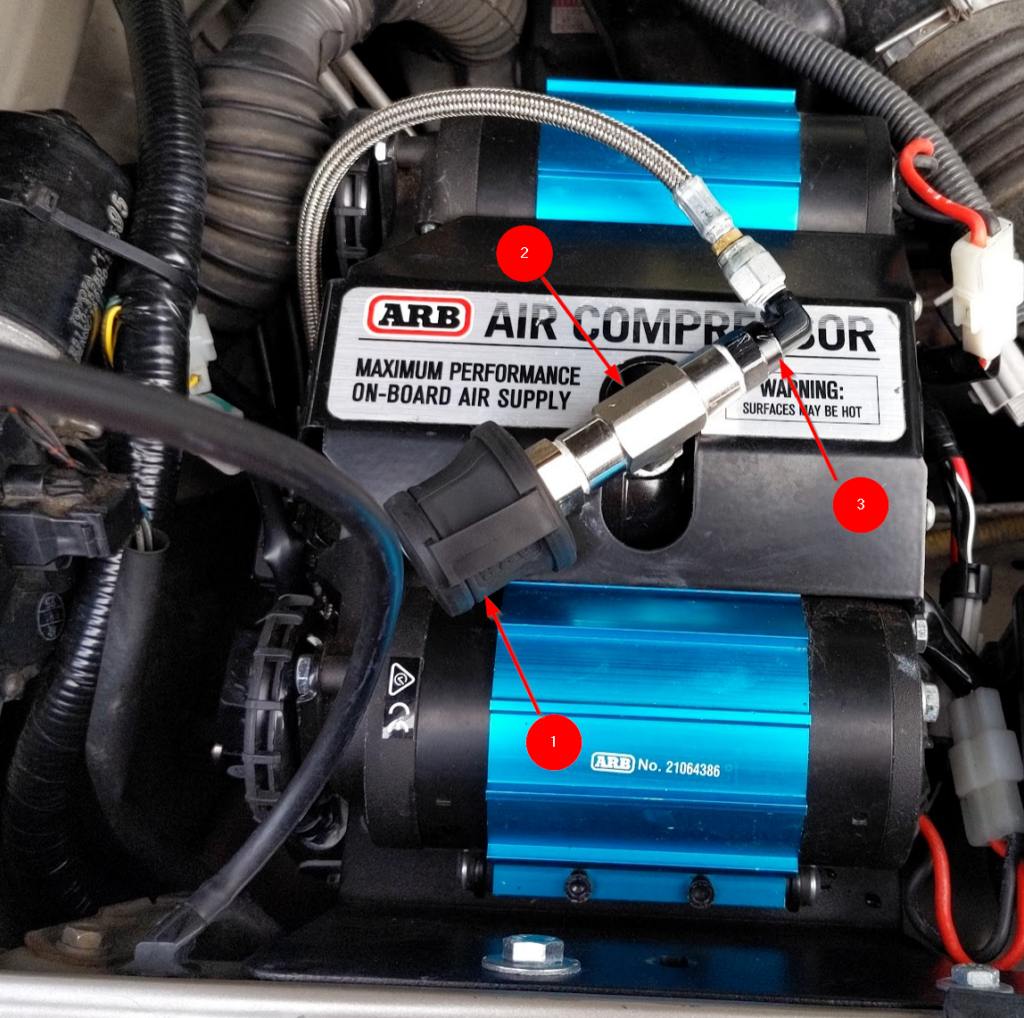
- Mount your ARB Twin Air Compressor according to their manual(s).
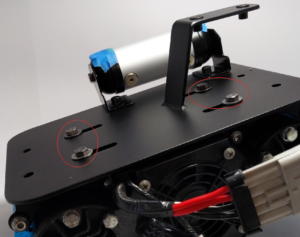
- Use the (4) M6 Bolts and (4) M6 Washers included with the ARB Twin Air Compressor Kit to mount the air compressor to the (1) 4Locked Offroad Air Compressor Bracket (#3GT4R-COMPMNT).
Note
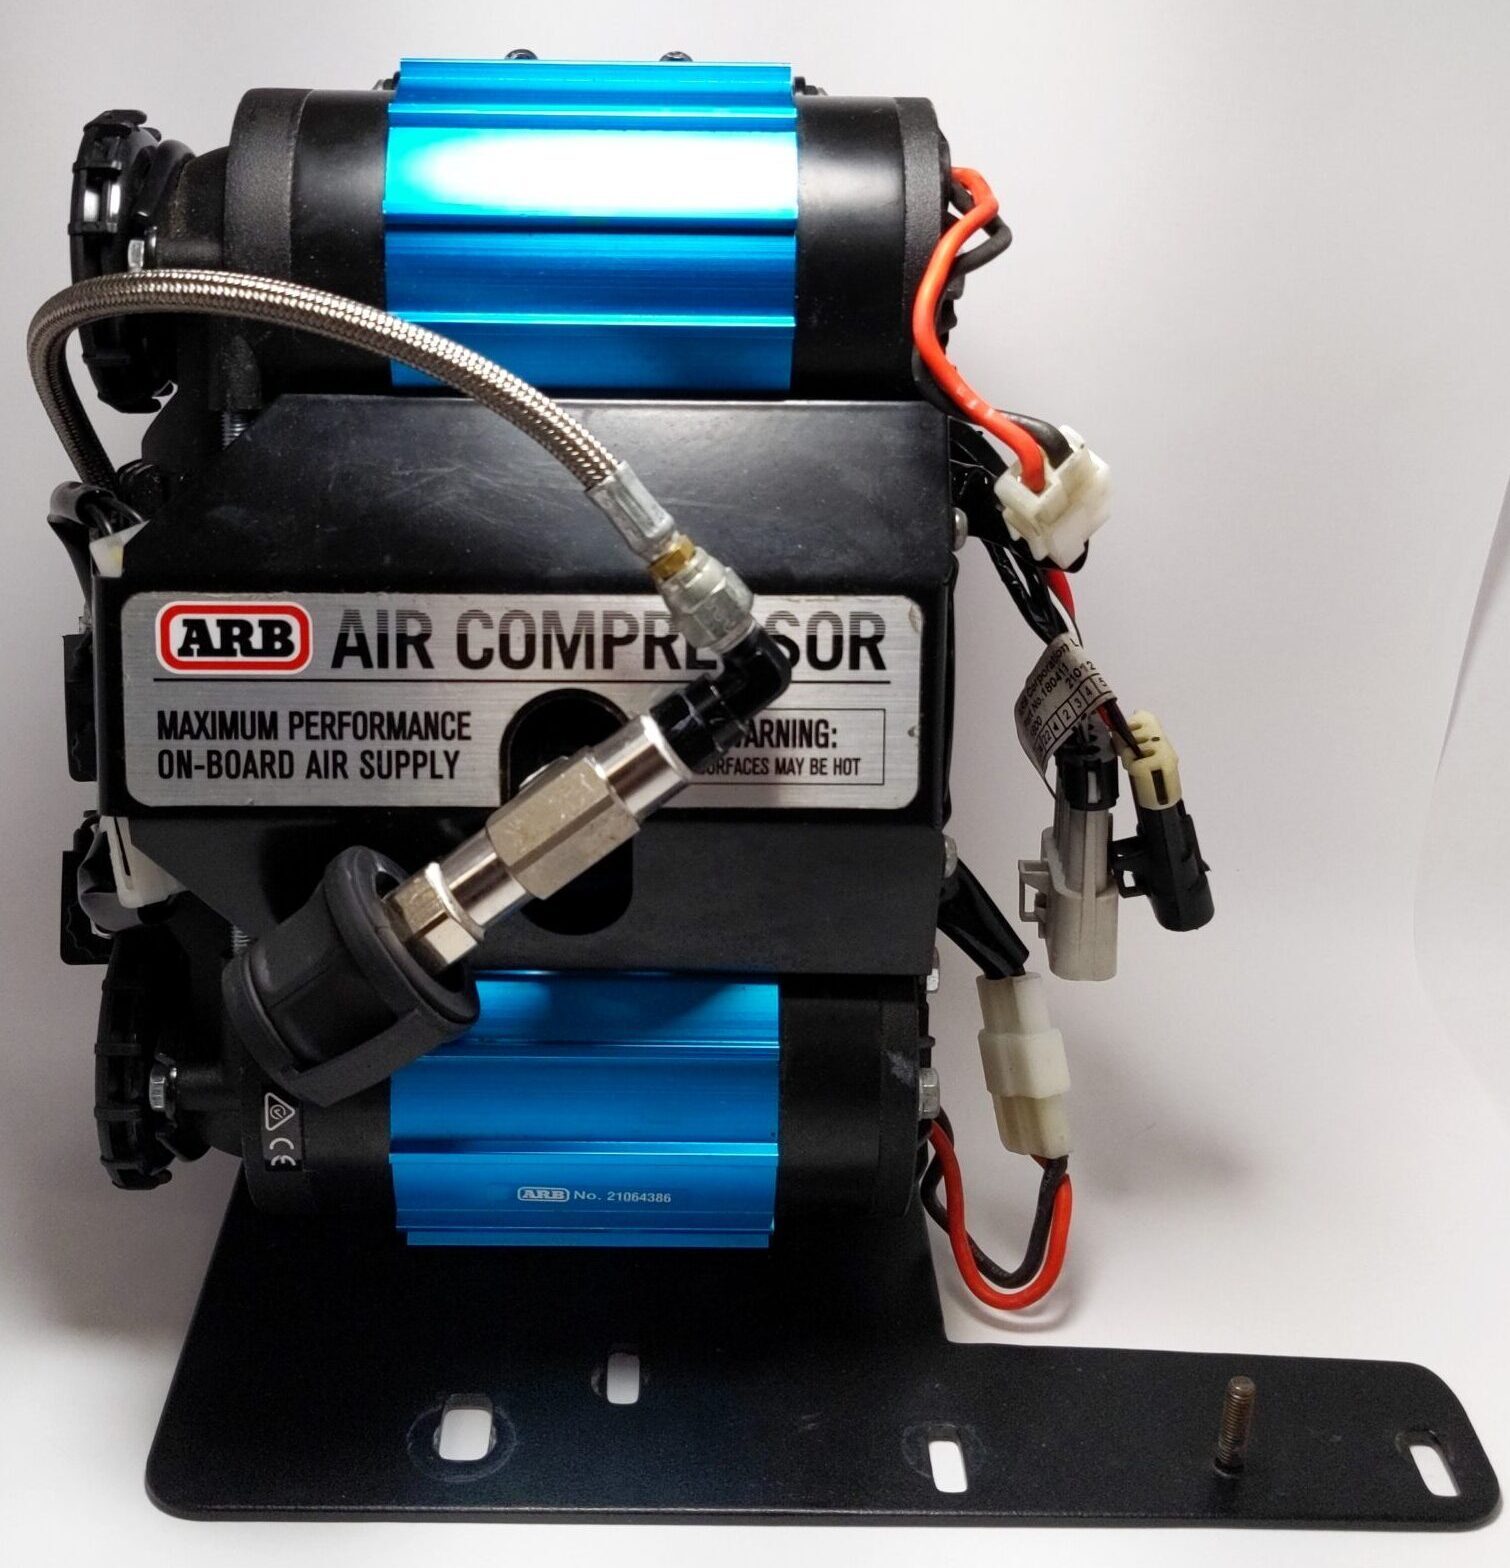
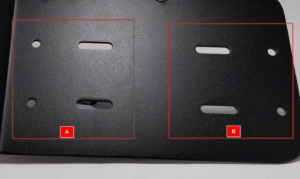
You can use the 2 sets of outer bolt holes or the 2 sets of elongated holes. Refer to the ARB Twin Air Compressor manual for the recommended bolting pattern. See below.
Materials
Parts
- (1) ARB Single Air Compressor (ARB #CKMA12, ARB #CKMA24, ARB #CKSA12)
- (1) 3rd Gen 4Runner/1st Gen Tacoma ARB Air Compressor Bracket Mount (4Locked Offroad #3GT4R-COMPMNT)
Hardware
Tools
- 10mm wrench
Instructions
- Mount your ARB Single Air Compressor Kit according to their manual(s).
- Use the bolts and washers provided by the ARB Single Air Compressor Kit to mount it to the (1) 4Locked Offroad Air Compressor Bracket (#3GT4R-COMPMNT).
Note
You can mount to either position A or position B using 1 set of the outer bolt holes and its accompanying set of elongated holes. See below.
Materials
Parts
- Teflon Paste (not included)
Hardware
- None
Tools
- None
Instructions
- Install your desired air fittings (not included) and seal their threads with Teflon Paste (not included) or similar.
- Turn on the air compressor and let it run until it comes to full system pressure and turns itself off.
- Leave the air compressor on for 30 minutes and if it turns on again within a 30 minute window then you have an air leak somewhere that needs to be sealed.
Note
A successful air leak test is when the air compressor can maintain full system pressure without turning on again in a 30 minute window. If the air compressor turns on again in 30 minutes then you have a small air leak somewhere that needs to be fixed.
Note
A good quality Teflon Paste may be better than Teflon Tape because the paste is much easier to work with and get right the first time. Always follow the air compressor’s manual for recommended install and testing.
Note
If you have the electrical know-how, power the air compressor while it’s on a workbench to check for air leaks. Always follow the air compressor’s manual for recommended install and testing.
Materials
Parts
- (1) Toyota ABS Relay Module
Hardware
- (2) M6 bolts (from Toyota ABS Relay Module, discarded and no longer used)
Tools
- 10mm wrench
- Wire Cutters
Note
Some years Toyota 4Runner/Tacoma don’t have this ABS Relay Module on the passenger side of the engine bay.
Instructions
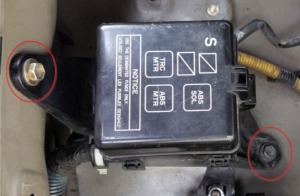
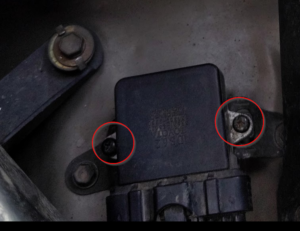
- Remove the (2) M6 bolts and set them aside (you won’t need either of these bolts again, save them for another project).
- Temporarily move the Toyota ABS Relay Module out of the way. You can carefully rest it on top of the air cleaner element.
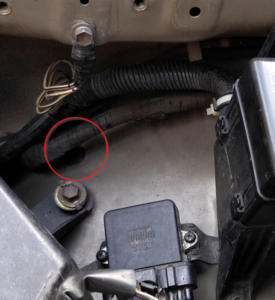
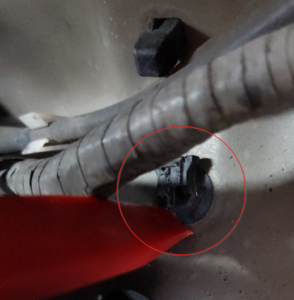
- If needed, carefully cut the body clip style zip tie securing the Toyota ABS Relay Module’s wire harness to the fender. This will allow the wire harness to move freely.
Materials
Parts
- (1) 3rd Gen 4Runner/1st Gen Tacoma Igniter Relocation Bracket (#3GT4R-IGNTMNT)
**included with 4Locked Offroad #3GT4R-COMPMNT** - (1) Toyota Igniter Control Module
Hardware
- (2) M5 screws (reused from Toyota Igniter Control Module)
- (2) M5 lock washers (reused from Toyota Igniter Control Module)
- (1) M5 screw (included with 4Locked Offroad #3GT4R-IGNTMNT)
- (1) M5 lock washer (included with 4Locked Offroad #3GT4R-IGNTMNT)
Tools
- Philips/Standard screw driver
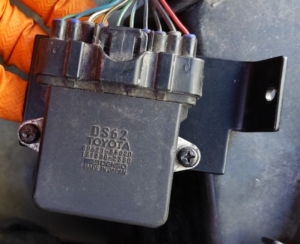
Some years Toyota 4Runner/Tacoma have an Igniter Control Module mounted horizontally on a Toyota factory bracket on top of the fender wheel well.
Remove the (2) M5 screws and (2) M5 locker washers holding the Toyota Igniter Control Module to the factory Toyota bracket. Leave the factory Toyota bracket where it’s at, our relocation bracket will bolt to this.
Mount the Toyota Igniter Control Module to the 4Locked Offroad Igniter Relocation Bracket (#3GT4R-IGNTMNT) using the (2) M5 screws and (2) M5 lock washers.
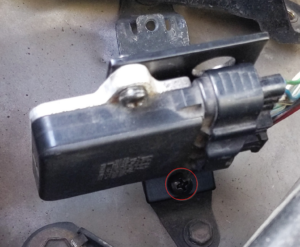
Take the (1) M5 screw and (1) M5 lock washer included with the 4Locked Offroad Igniter Relocation Bracket (#3GT4R-IGNTMNT) and secure it to the factory Toyota Igniter Control Module bracket (on the side closest to the air cleaner element).
Materials
Parts
- (1) 3rd Gen 4Runner/1st Gen Tacoma ARB Air Compressor Bracket Mount (4Locked Offroad #3GT4R-COMPMNT)
Hardware
- (5) M6 Bolts (included with 4Locked Offroad #3GT4R-COMPMNT)
- (5) M6 Fender Washers (included with 4Locked Offroad #3GT4R-COMPMNT)
- (2) M6 Lock Washers (included with 4Locked Offroad #3GT4R-COMPMNT)
- (1) M8 Bolt (included with 4Locked Offroad #3GT4R-COMPMNT)
- (1) M8 Fender Washer (included with 4Locked Offroad #3GT4R-COMPMNT)
Tools
- 10mm wrench
- Carefully place the 4Locked Offroad Air Compressor Bracket (#3GT4R-COMPMNT) in the engine bay.
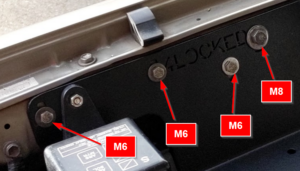
- Attach the top of the 4Locked Offroad Air Compressor Bracket (#3GT4R-COMPMNT) to the fender using (3) M6 Fender Washers, (3) M6 Bolts, (1) M8 Bolt and (1) M8 Fender Washer. Do not tighten them.
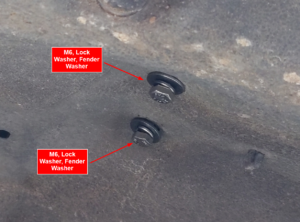
- Attach the vertical support of the 4Locked Offroad Air Compressor Bracket (#3GT4R-COMPMNT) to the fender wheel well using (2) M6 Fender Washers, (2) M6 Lock Washers and (2) M6 Bolts. Do not tighten them.
- Tighten the (3) M6 Bolts and (1) M8 Bolt at the top of the bracket.
- Tighten the (2) M6 bolts in the fender wheel well.
Note
When placing the 4Locked Offroad Air Compressor Bracket (#3GT4R-COMPMNT) in the engine bay it helps to go in at a 45 degree angle to get past the air cleaner element hose. With the right finessing and angles it will fit nicely and should make NO contact with anything in the engine compartment. If something is making contact, find a way to micro adjust things to avoid chafing.
Note
Do not torque down the bolts until you get them all started, including the fender wheel well bolts that go through the vertical support. Sometimes you have to start the ones at the top and then move the assembly up/down/side to side to get the vertical support holes to align.
Note
We have seen some years without threads in some of the fender holes. For some reason, Toyota was not consistent across years and/or trims on installing threads in all the holes. The holes in the fender wheel well that secure the bracket’s vertical support to the vehicle should not have factory threads. That’s why we designed the vertical support with its own threads. If the fender wheel well has factory threads then please email support@4lockedoffroad.com
Note
We have seen some fender wheel wells that only have 1 instead of 2 holes. If this is the case for you, it’s OK to use only 1. If your fender wheel well doesn’t have any holes where the vertical support is at, or they’re not aligned you should be able to get away with not using them. So long as the vertical support is resting close enough to/on the fender wheel well to prevent excessive strain on the side of the engine bay. You can test for the amount of play by firmly pushing down on the whole assembly and look for how much downward play you are getting. Ideally you should not have zero downward play or the most around ⅛.
Materials
Parts
- (1) 3rd Gen 4Runner/1st Gen Tacoma ARB Air Compressor Bracket Mount (4Locked Offroad #3GT4R-COMPMNT)
- (1) Toyota ABS Relay Module
Hardware
- (1) M6 nut (included with 4Locked Offroad #3GT4R-COMPMNT)
- (1) M6 Threaded Stud (built into 4Locked Offroad #3GT4R-COMPMNT)
Tools
- 10mm wrench
Instructions
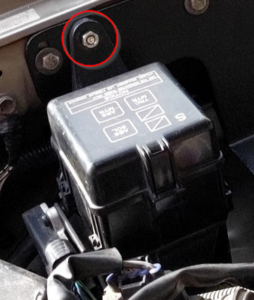
- Attach the top of the Toyota ABS Relay Module to (1) M6 Threaded Stud using (1) M6 Nut
- Tighten the (1) M6 Nut
You can now connect your air locker lines to your Air Locker Solenoids using the ARB Push-In Quick Connect fittings. Feel free to route the air lines how you see fit.
Typically the hard air lines will be routed along the opposite side to the exhaust system. In most 3rd Gen 4Runner and 1st Gen Tacoma this means locker air lines will be routed along the driver-side frame rails, up the driver side engine bay and across the windshield cowl/firewall. Because of this we recommend routing them along the same path as the ARB Air Compressor Wire Harness since that is traveling along the same path anyways.
Now comes the important part, you need to make sure your configuration of all airlines and air fittings clear the hood. Carefully lay the hood down and ensure it can be latched without out of the ordinary force.
Note
If you used Teflon Paste to make your air connections airtight you will find that it can also help you test for clearance issues. Simply place masking tape on the highest protruding part of your setup, brush it with teflon paste and gently let the hood down. If you have clearance issues you will likely find Teflon Paste on the underside of your hood. When done peel the masking tape off and discard.
Other things that could be used here instead of Teflon Paste is anything you can apply and wipe off like white lithium grease, bearing grease, etc.
4Locked Offroad Air Compressor Bracket (#3GT4R-COMPMNT) has been tested to work with the following hood struts.
- Spiker Engineering 96-02 4Runner Hood Strut Kit

